In Ubico, contacts live inside segments. To add people to your workspace, you create a manual segment and upload your contacts as a CSV — or enter them one by one.
Steps
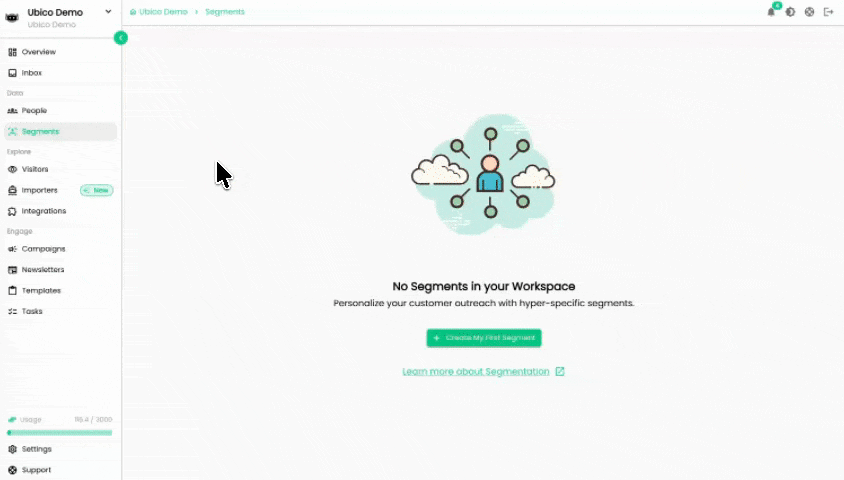
- Go to Segments from the left sidebar.
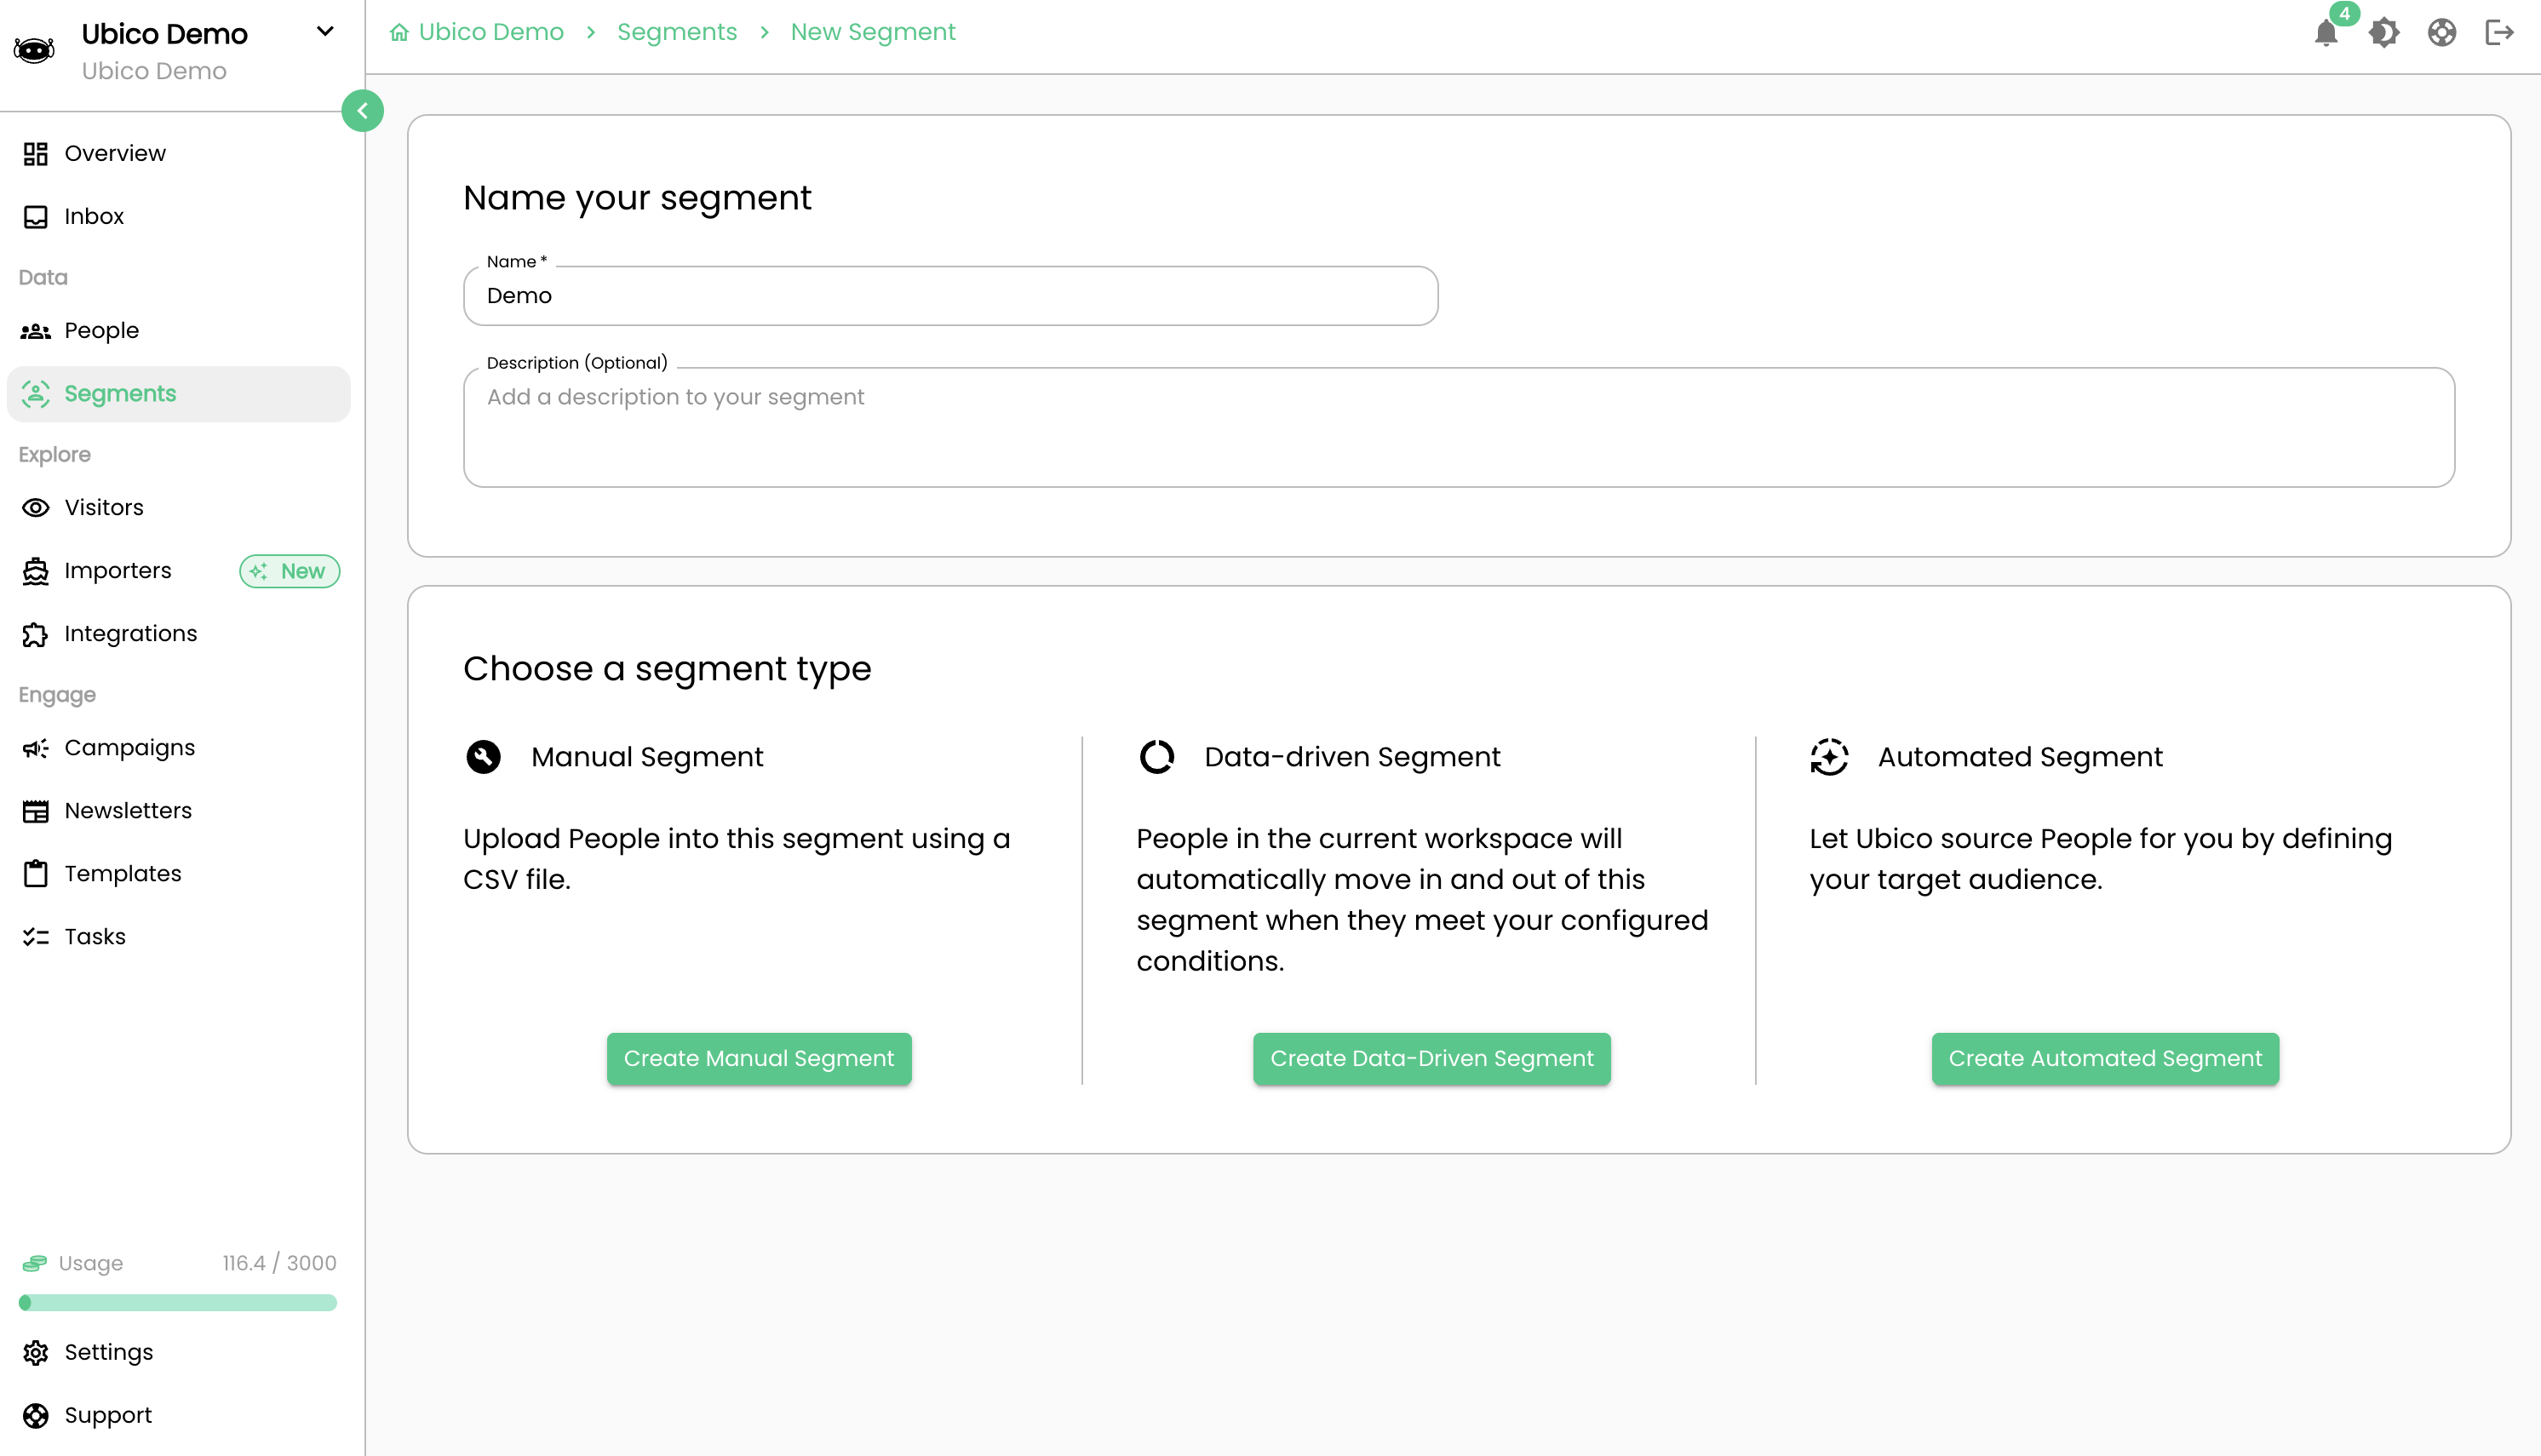
- Click Create Segment in the top right corner.
- Name your segment and select Manual Segment as the type.
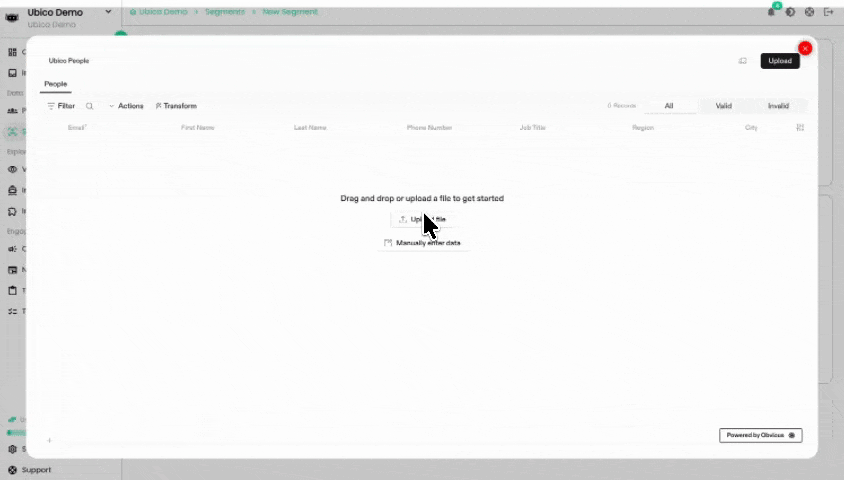
- Add your contacts — upload a CSV file or enter contacts one by one.
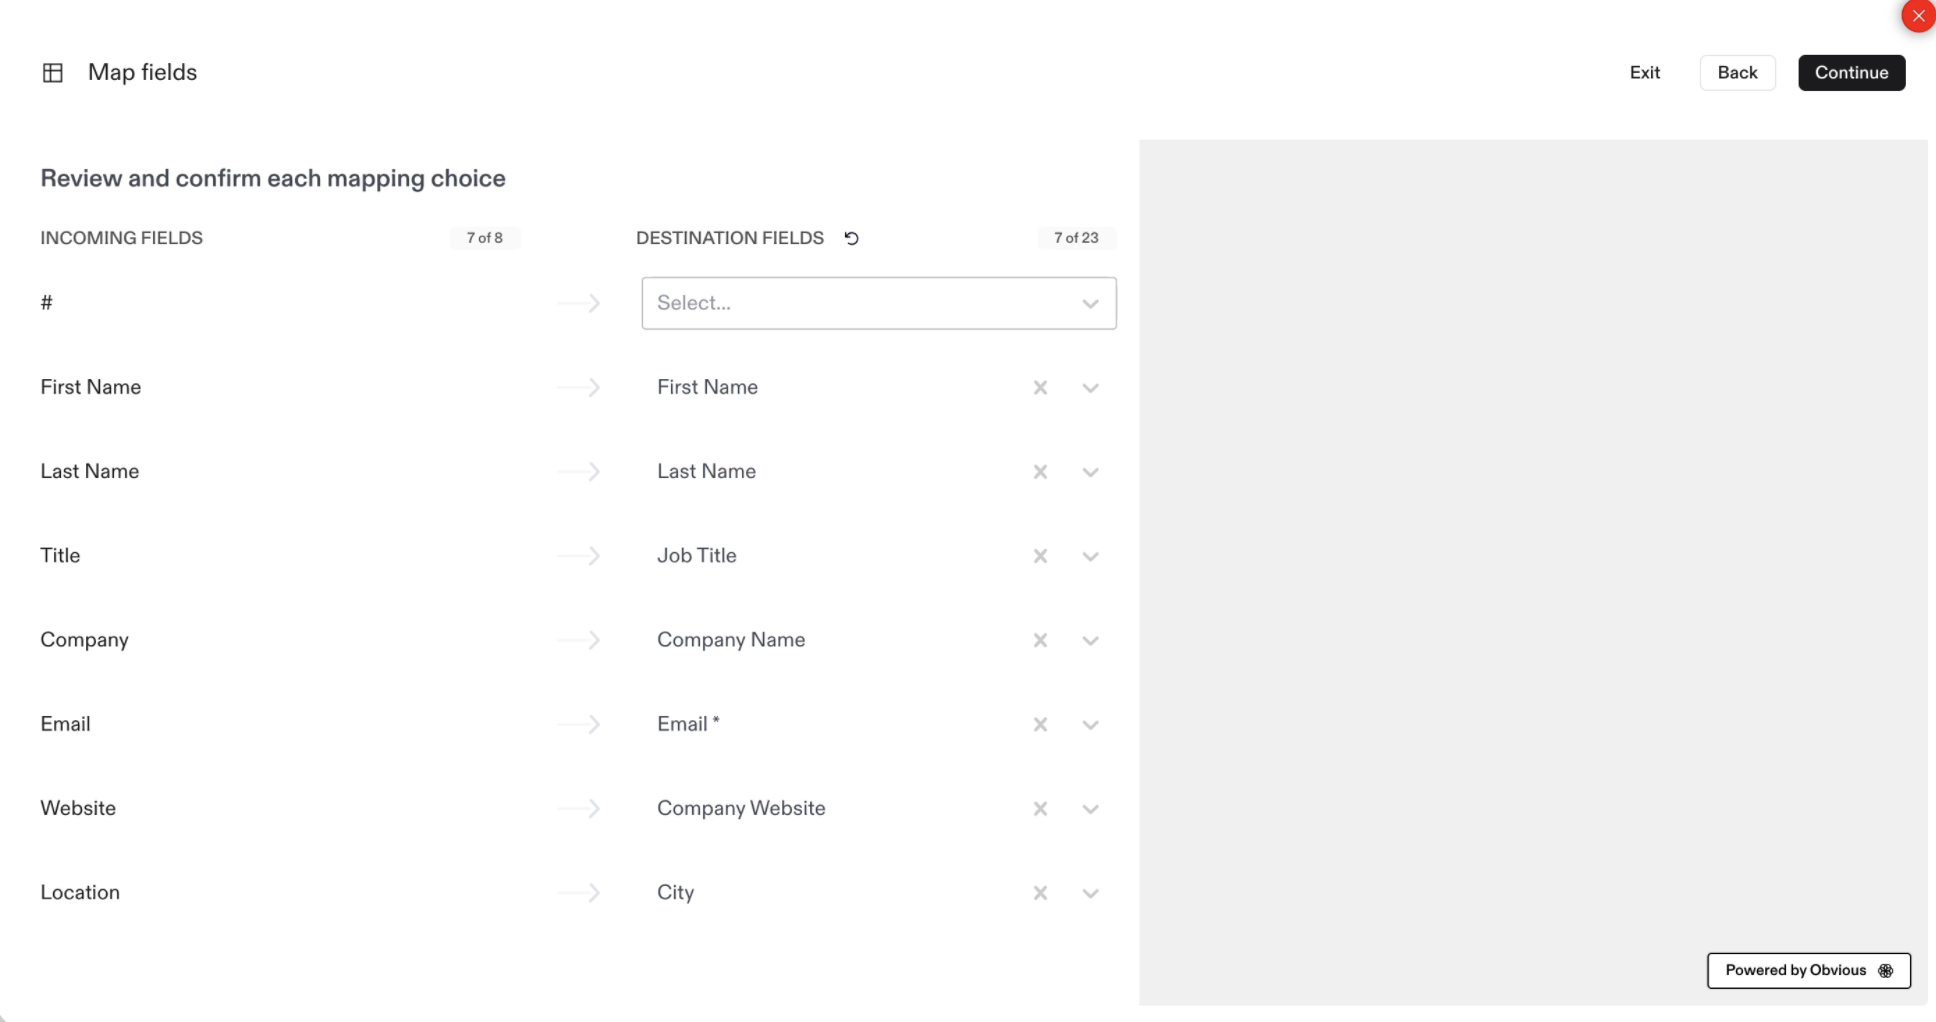
- Map your CSV fields to Ubico's fields. This usually happens automatically — double-check that the right data is going into the right columns.
- Click Continue. Ubico processes the data and adds your contacts to the segment. This takes about a minute.