Campaigns are how you send outreach in Ubico. Each campaign has a segment, a sending schedule, and a workflow that defines the steps contacts move through.
Steps
- Go to Campaigns from the left sidebar and click Create Campaign in the top right.
- Name your campaign — use something that reflects the goal or audience (e.g. "Logistics outbound Q2").

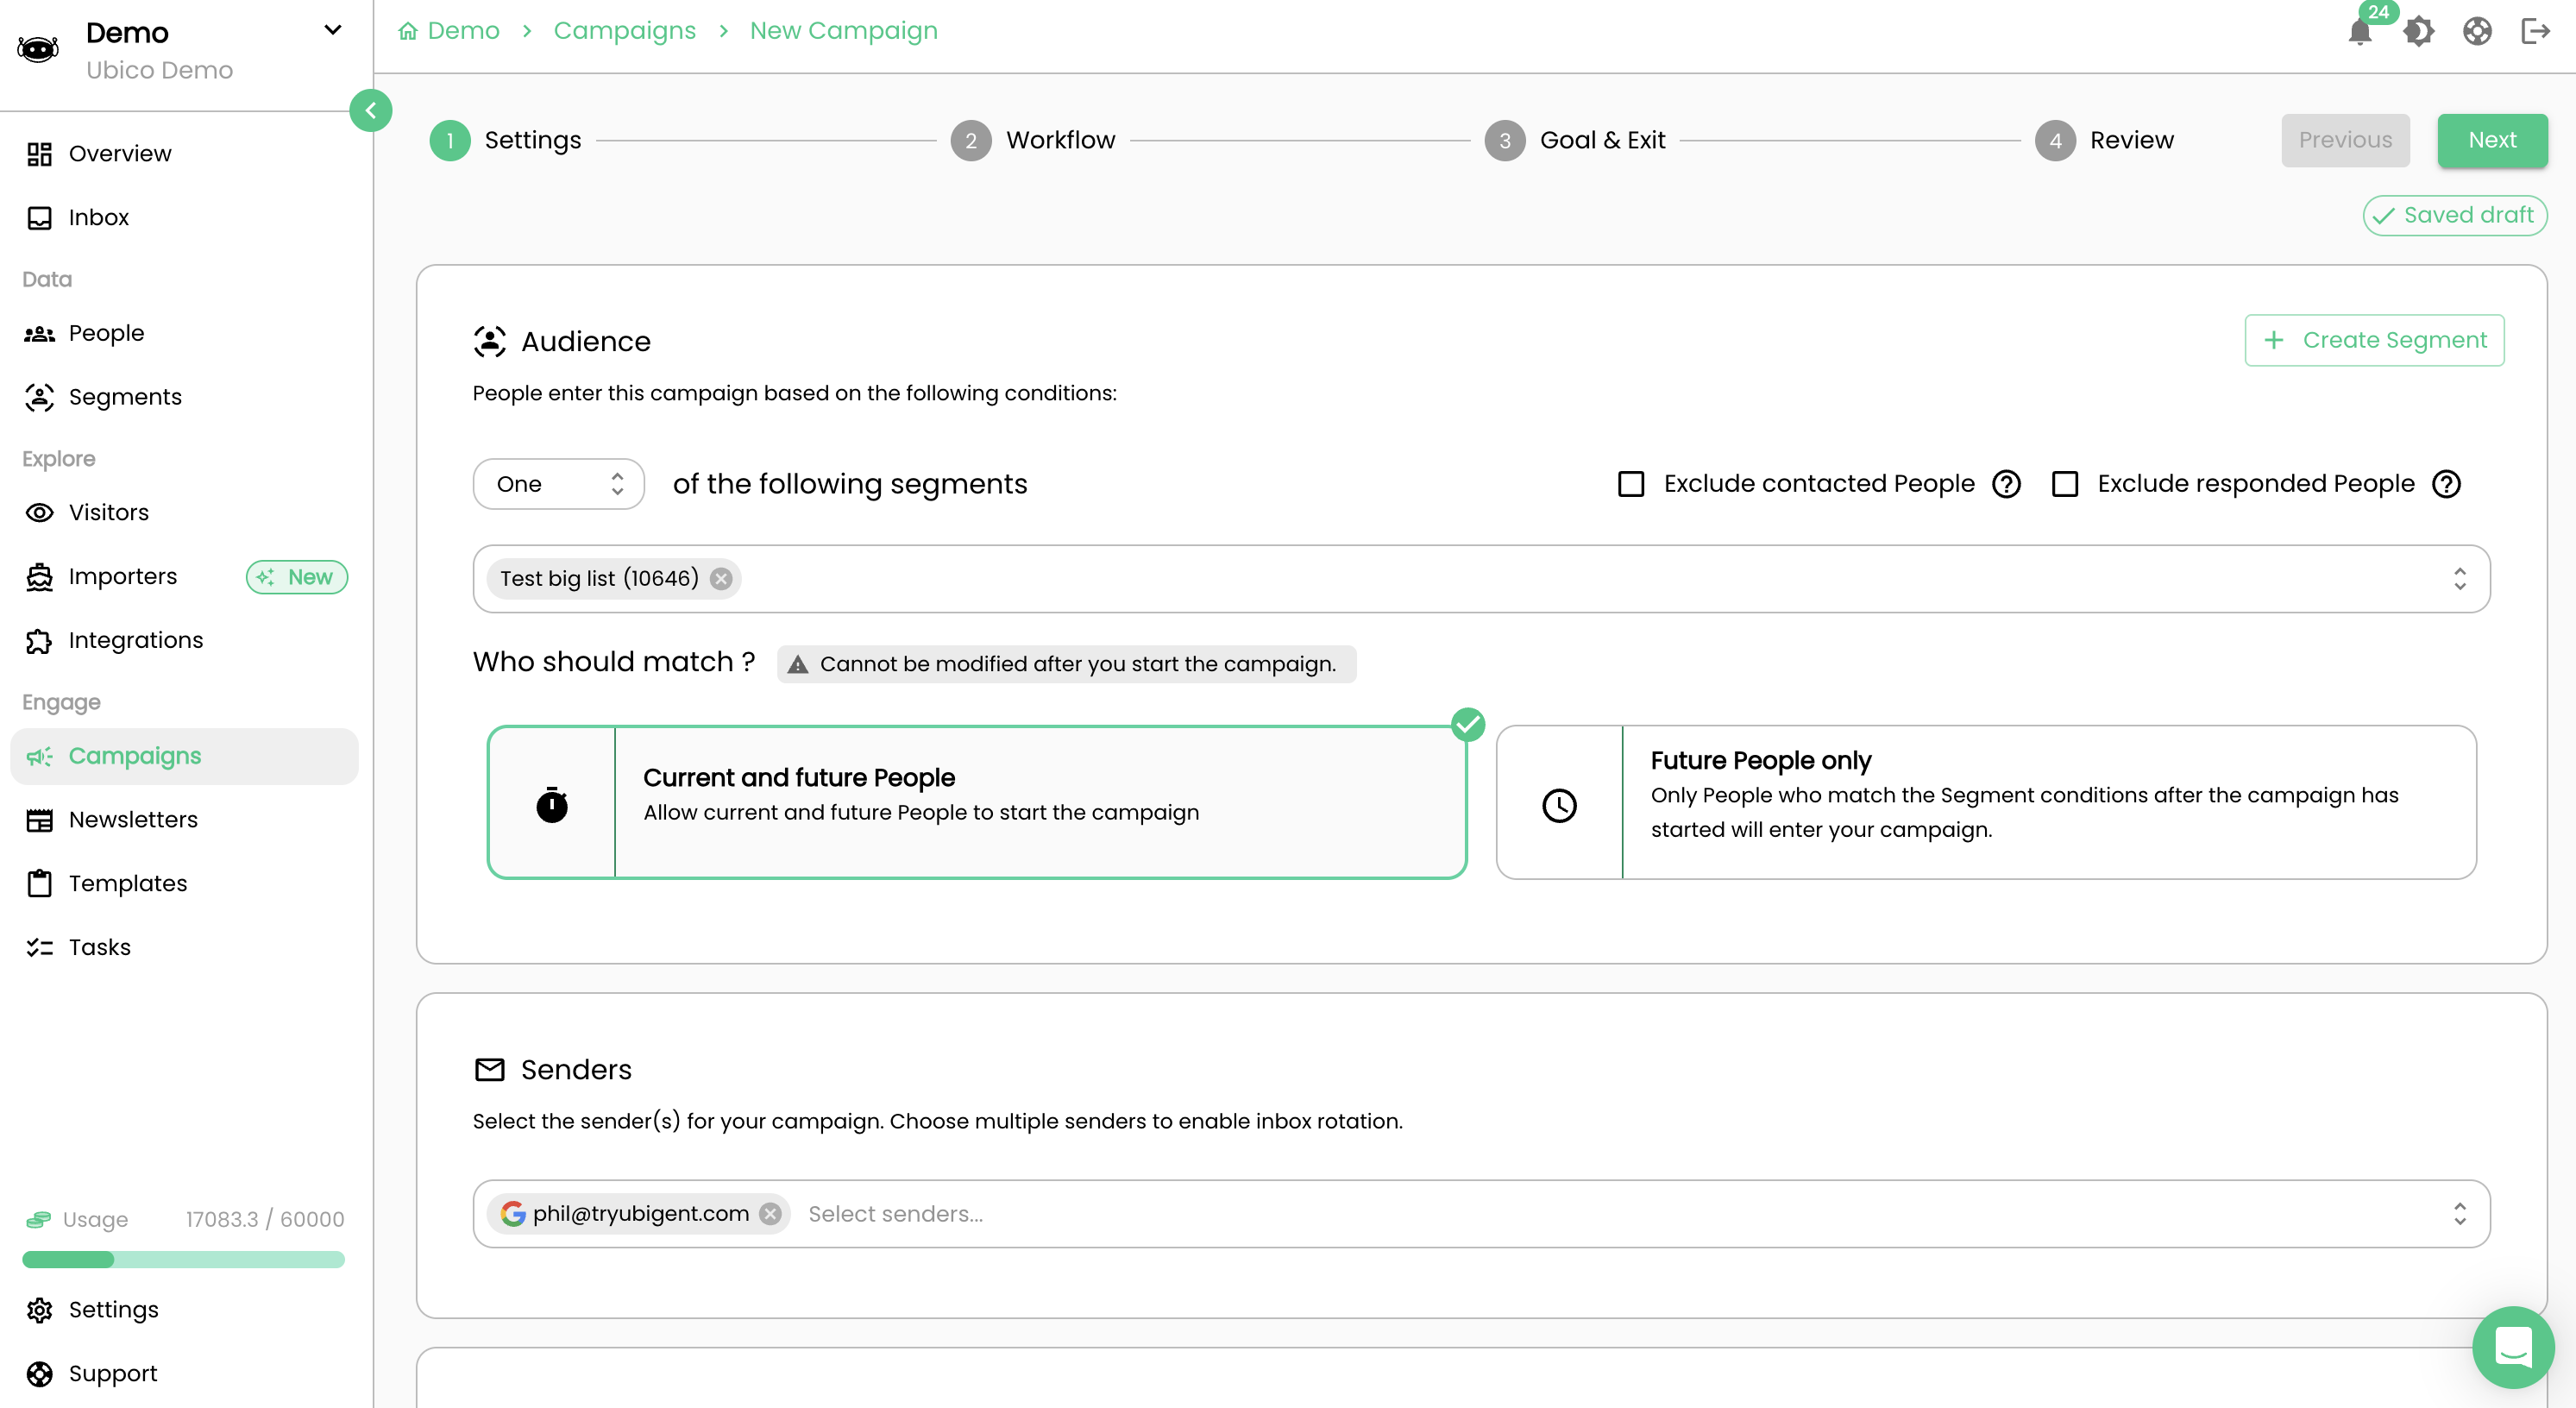
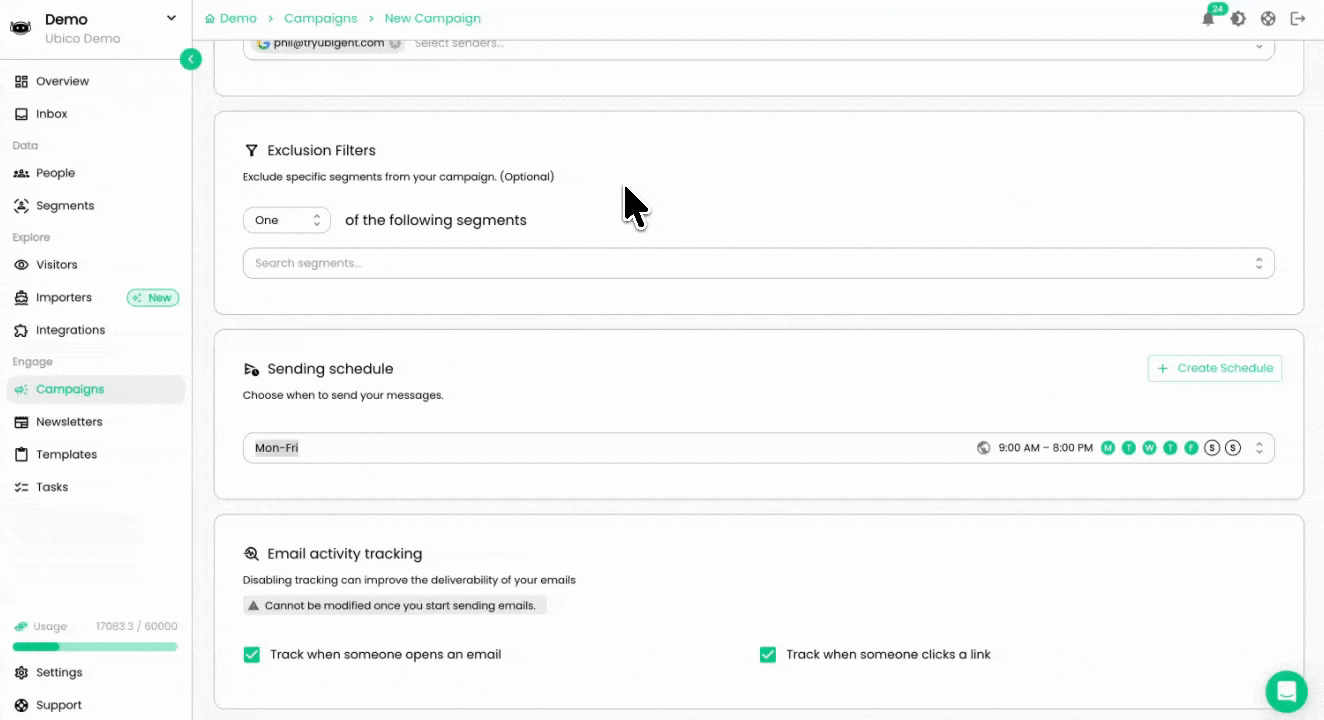
- Select a segment — the group of contacts you want to reach. You can also exclude specific segments if needed.
- Choose your sending email accounts. You can rotate between multiple accounts to improve deliverability.
- Set your sending schedule — days and hours when emails go out. Defaults to business hours.
- Click Next to go to the Workflow tab. Choose how to build your sequence.
Workflow options
- AI generated — type a prompt and pick a tone. Ubico builds the sequence for you.
- Templates — start from a ready-made Ubico template.
- Create from scratch — build the workflow step by step using the visual builder.
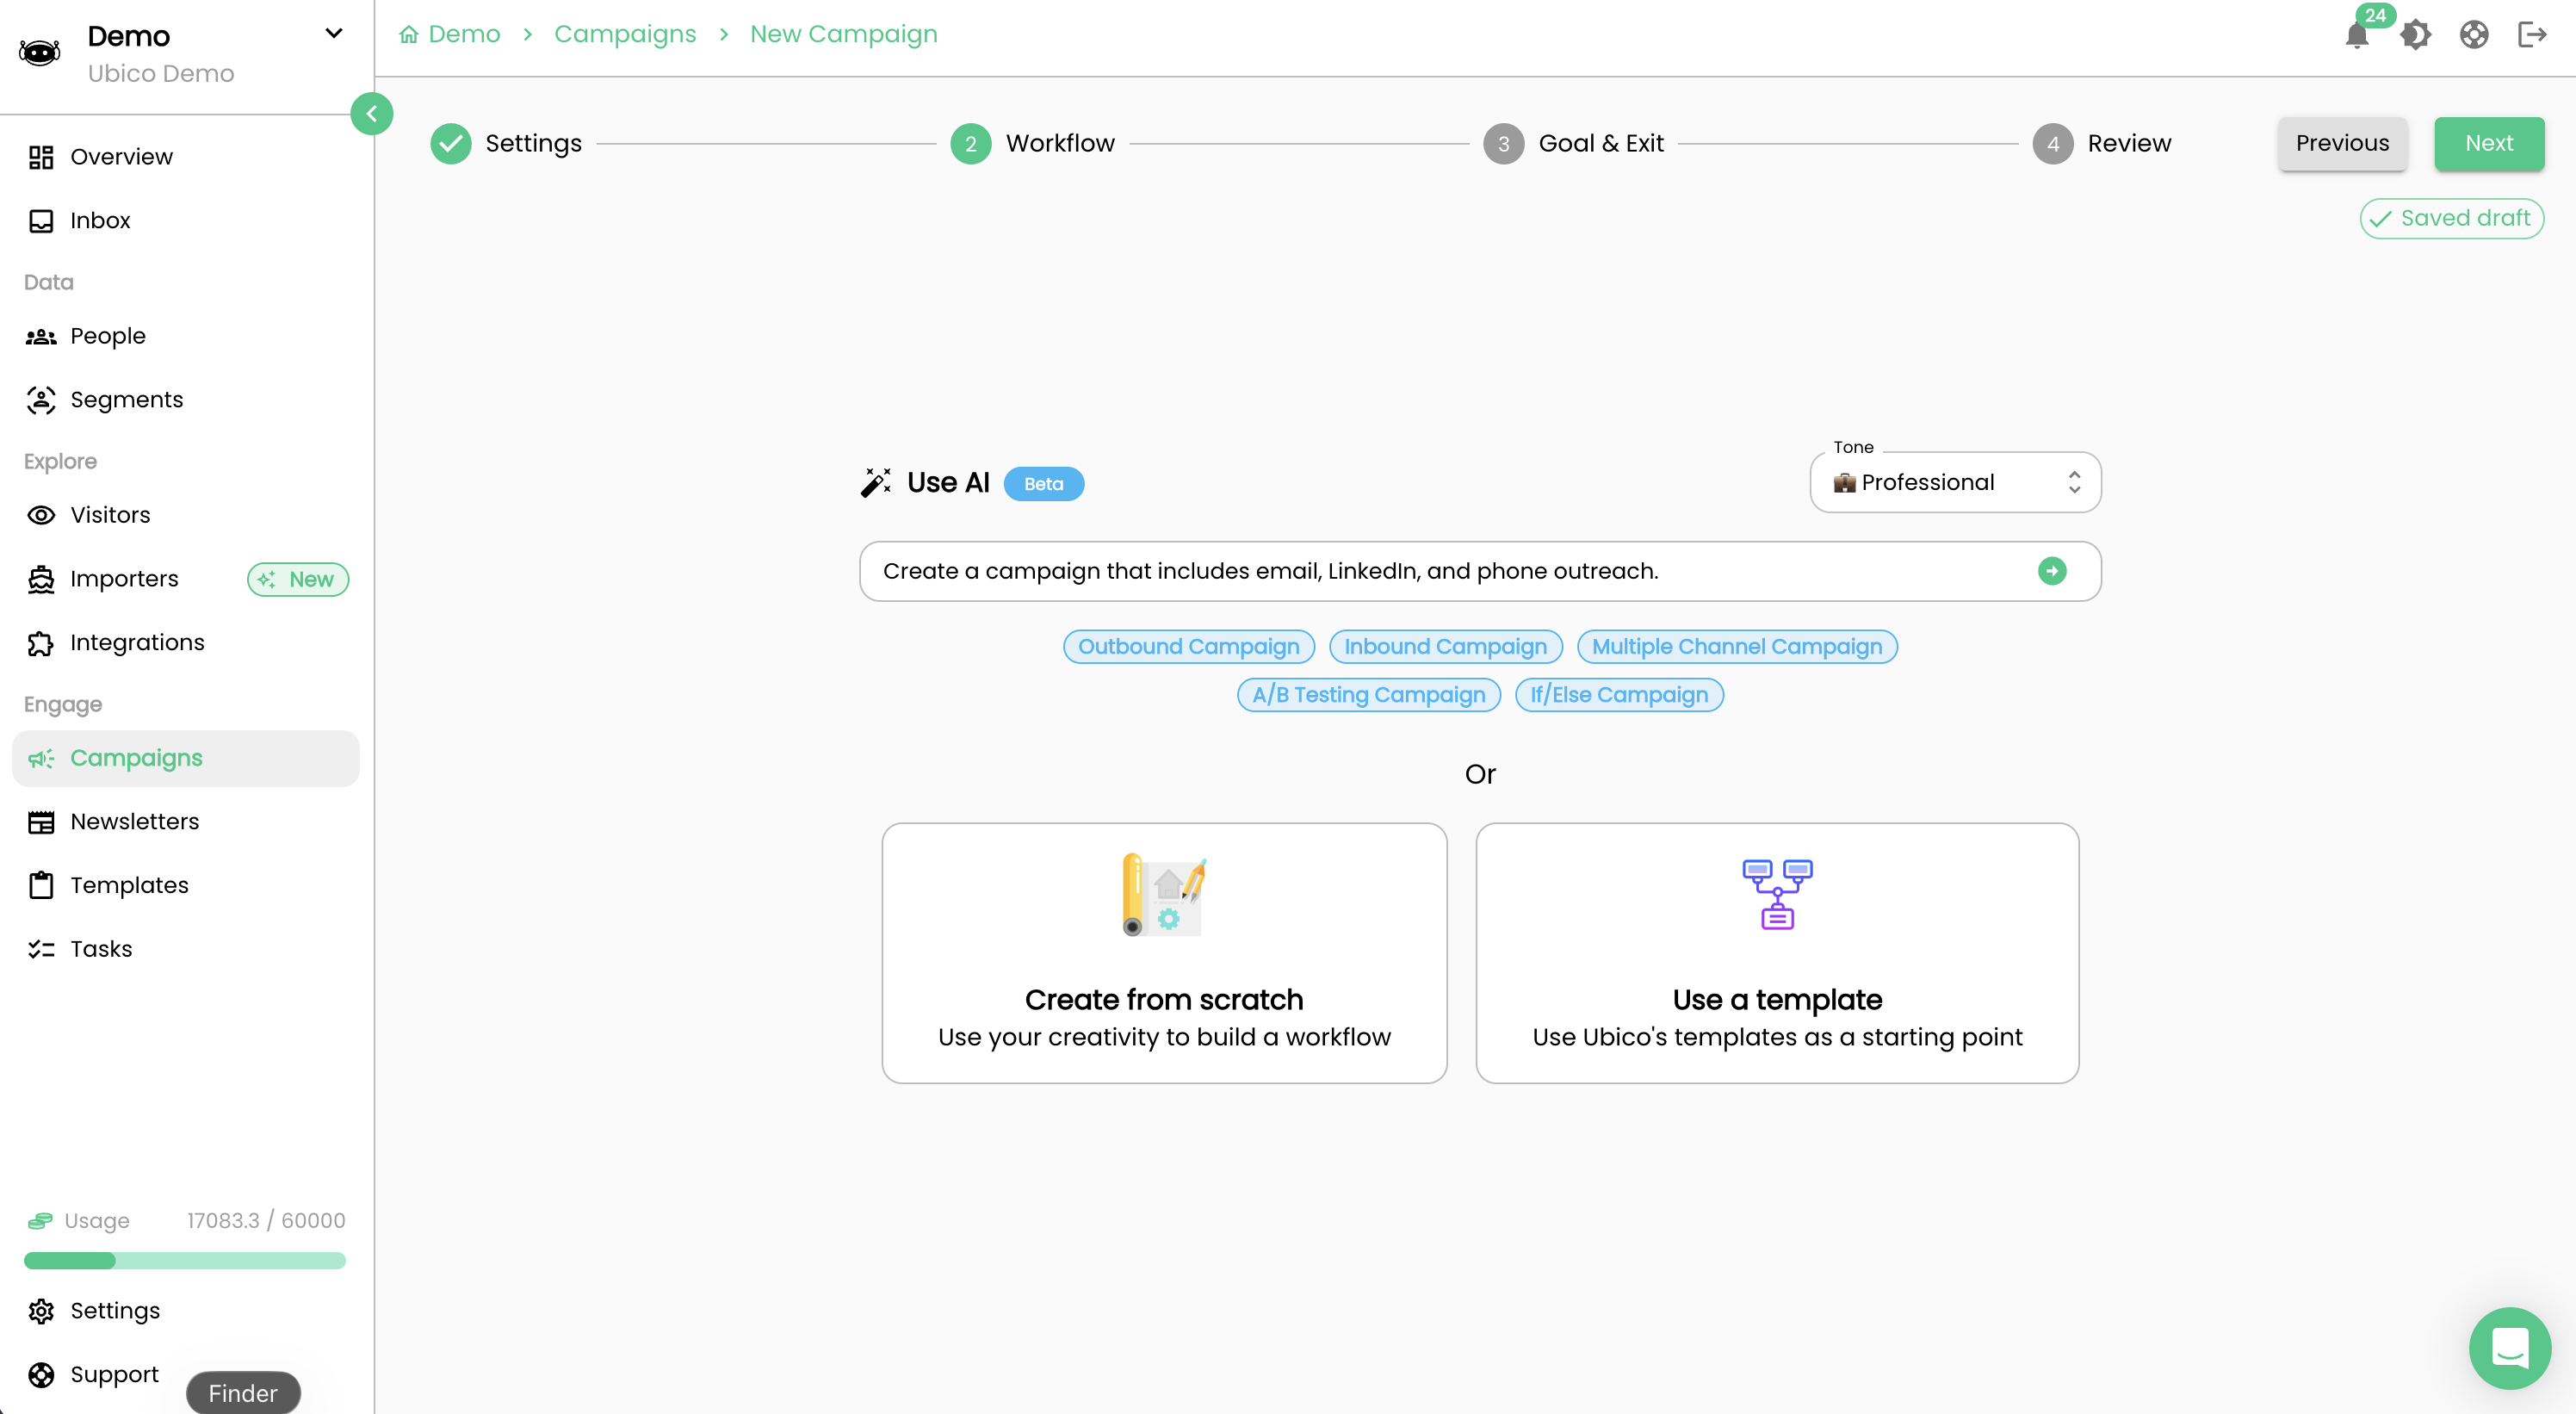
Each step in the workflow can be an email, LinkedIn touch, call, or task. You can personalize messages at each step or set them to send automatically.

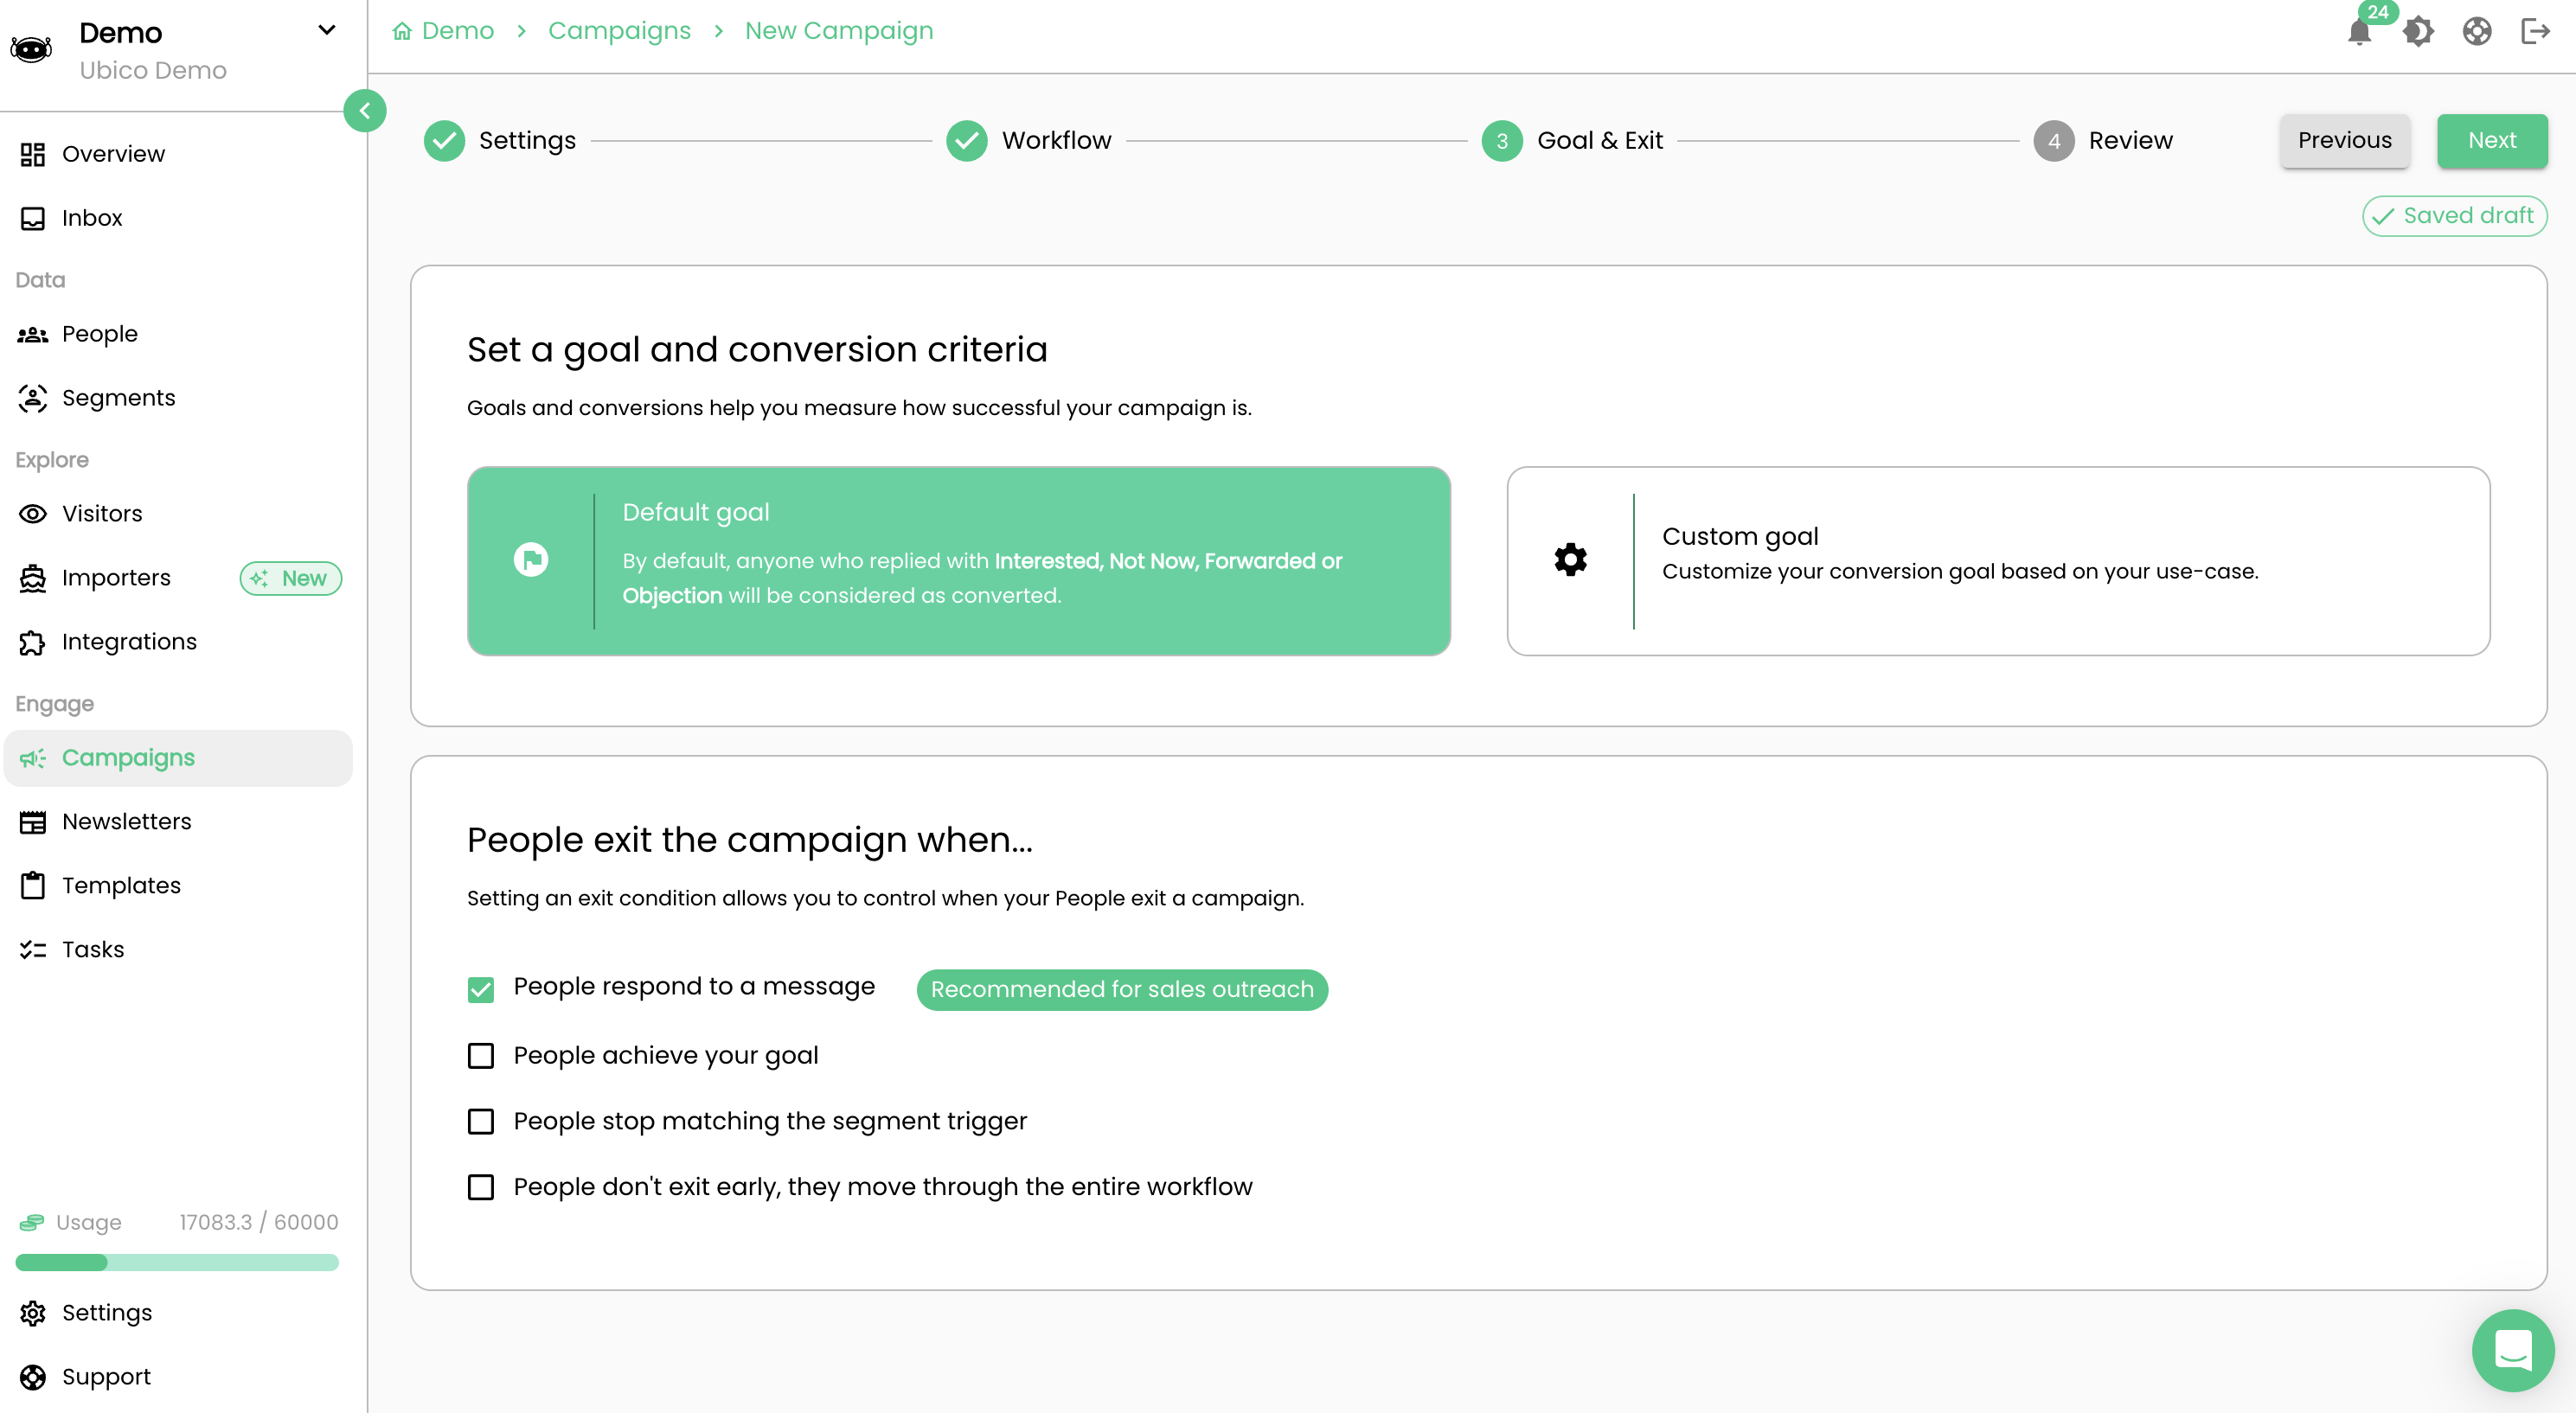
- Set your Goal and Exit conditions. The default goal counts any reply tagged as Interested, Not Now, Forwarded, or Objection as a conversion. Switch to Custom goal to define your own criteria. Choose when contacts exit — on reply, on goal, when they leave the segment, or after completing the full workflow.
- Review and launch. Check everything in the Review tab and finalize your campaign.